Friday, September 26, 2008

olpc default no password

I received an OLPC in the mail today. It's on loan from a family member who got it as a gift for her daughter. I was told "It's not a REAL computer! - can you fix it?"

Yes, send it to me.

Whatever it takes right? I couldn't wait to tear into this thing.

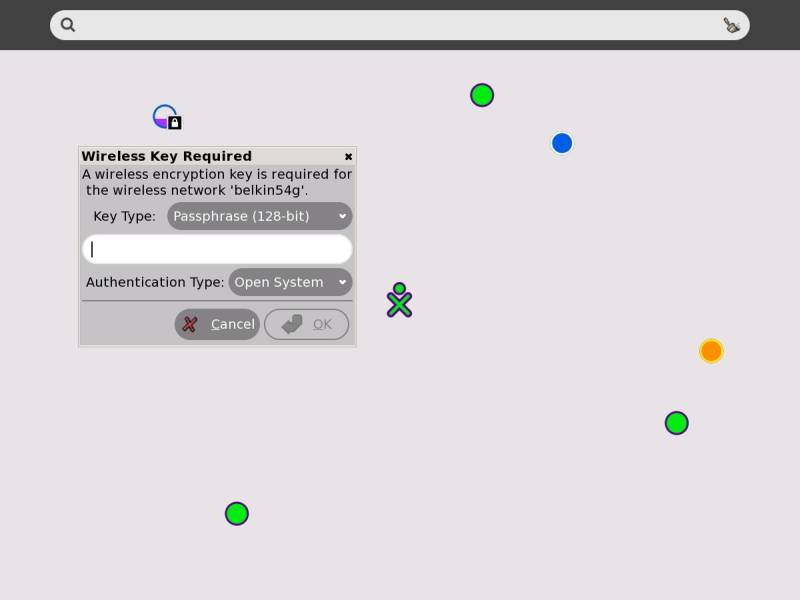
SSH is up and running by default out the gate. Just go to the "Neighborhood View" and connect to your in home wireless AP and you can hit ssh right away:

[olpc@xo-14-7F-A0 ~]$ telnet 192.168.1.118 22
Trying 192.168.1.118...

Connected to 192.168.1.118.

Escape character is '^]'.

SSH-2.0-OpenSSH_4.5

Which is cool, but there's a catch - you can't login.

The default user is named 'olpc' - this user, as well as root DO NOT HAVE A DEFAULT PASSWORD.

The password file is shadow'd:
[olpc@xo-14-7F-A0 ~]$ egrep '^(root|olpc)' /etc/passwd
root:x:0:0:root:/root:/bin/bash
olpc:x:500:500::/home/olpc:/bin/bash

But if you look at the hash in /etc/shadow you see olpc's "current password hash" is "!!" - which is not valid:
[olpc@xo-14-7F-A0 ~]$ egrep '^(root|olpc)' /etc/shadow
root::13880:0:99999:7:::
olpc:!!:14148:0:99999:7:::

root's password is just plain empty
!

Which is handy on the local system:
[olpc@xo-14-7F-A0 ~]$ whoami
olpc

[olpc@xo-14-7F-A0 ~]$ su

bash-3.2# whoami

root


But kind of awkward when you try to login via ssh:
login as: olpc
olpc@192.168.1.118's password:

Access denied


The tricky part about that invalid "!!" hash is that it's neither a blank password nor a valid password. The olpc user can't even change it's OWN password because there is NO CURRENT VALID PASSWORD:
[olpc@xo-14-7F-A0 ~]$ passwd
Changing password for user olpc.
Changing password for olpc.
(current) UNIX password:

passwd: Authentication token manipulation error


So we decide move on to root.

Root has an 'empty' password. Which is valid - but it had me raise en eyebrow as well.

login as: root
root@192.168.1.118's password:
Access denied


I was slightly forgiving after my investigation into the default configuration of OpenSSH.
bash-3.2# egrep '#Permit(Root|Empty)' /etc/ssh/sshd_config
#PermitRootLogin yes
#PermitEmptyPasswords no

Because these configuration lines are commented out, the ssh server goes with the standard OpenSSH settings. Which will NEVER allow the super user to to authenticate directly over ssh, and furthermore would not allow ANY user with an empty password to authenticate anyway.

To login to your OLPC XO Laptop via ssh you will need to:
1) open a local terminal
2) su to root
3) set a valid password for the 'olpc' user
4) connect to the laptop
as the 'olpc' user via ssh using the new password you just created

e.g.

[olpc@xo-14-7F-A0 ~]$ whoami
olpc
[olpc@xo-14-7F-A0 ~]$ su
bash-3.2# passwd olpc
Changing password for user olpc.
New UNIX password:
BAD PASSWORD: it is too short
Retype new UNIX password:
passwd: all authentication tokens updated successfully.
bash-3.2# exit
exit
[olpc@xo-14-7F-A0 ~]$ ssh olpc@192.168.1.118
The authenticity of host '192.168.1.118 (192.168.1.118)' can't be established.
RSA key fingerprint is d4:5a:b0:30:0d:eb:61:9c:df:c9:32:0e:ab:ff:51:9e.
Are you sure you want to continue connecting (yes/no)? yes
Warning: Permanently added '192.168.1.118' (RSA) to the list of known hosts.
olpc@192.168.1.118's password:
[olpc@xo-14-7F-A0 ~]$

Stay tuned - More to come!

Saturday, September 13, 2008

Display free memory in Linux / Ubuntu

Short Answer:
free -m | awk 'NR==3 {print $4 " MB"}'

The command 'free' displays some formatted information from /proc/meminfo.
The throw '-m' displays these numbers in rounded megabytes.


# free -m
         total      used     free   shared     buffers     cached
Mem:      4049      3982       67        0          16       3530
-/+ buffers/cache:   435     3614
Swap:     6142        53     6088

It's strange, cause I always figured the "first row, third column" - right under 'FREE' - would be the amount of free memory on a Linux system. But that number was always low after I'd been running awhile.


And it turns out that it is NOT really what I was looking for. A more accurate representation of the memory being used by your applications and available for new processes is displayed in the SECOND line.

In addition to the memory that is actually being USED by the kernel and processes resident in memory - Linux also reserves memory to allocate to processes as 'buffers' AND uses pretty much any left over memory to hold "cached" files.

Looking only at the top line...
total = all memory in the system (4GB on this server)
used = all memory currently in use/reserved by running processes and the OS
free = total - used
shared = memory being shared by multiple processes (deprecated?)
buffers = memory reserved by the OS to alloc as buffers when process need them (aka the 'heap')
cached = recently used files being stored in ram (THANK YOU LINUX!)

Here's a simple example I found to show off the power of 'caching':
for i in 1 2 ; do free -o; time grep -r foo /usr/bin >/dev/null 2>/dev/null; done
So really the buffers would be allocated to a running process if it asked for them anyway, and the memory being used to cache copies of recently used files would be released immediately if it makes sense to allocate the RAM elsewhere. So all that memory is 'available'.

Using these definitions:

When thinking about 'how much memory is really being used' - I want to calculate:
'used' - ('buffers' + 'cached')

When thinking about 'how much memory is really free' - I want to calculate:
'free' + ('buffers' + 'cached')

With this in mind, the meaning of the second row header form the output of the Linux command "free" (-/+ buffers/cache:) makes more sense...

Free is doing some light lifting for us, using the formula's above to display:
"minus buffers and cache" for the used column
and
"plus buffers and cache" for the free colum

So when you run free on Linux - the amount of free memory is always displayed right there in the second row, third column. Hence the 'Short Answer'...

- Much respect to Mike Griffin who got me thinking about this.

Thursday, September 4, 2008

DD-WRT Xbox LIVE open NAT

When I first setup my DD-WRT router I had problems with Xbox LIVE reporting strict NAT and then moderate NAT.

To achive "open" NAT status on Xbox LIVE your best bet is ALWAYS UPnP.

Not DMZ.
Not even setting up manual LIVE port forwarding.

Both of these methods fall apart if you have two Xboxs. UPnP allows the Xbox(s) to decide the best ports to use, when they should be open and when to close them.

By default the DD-WRT v24 firmware disables UPnP.

To Enable UPnP on DD-WRT v24:
NAT / QoS -> UPnP ->
UPnP Service: Enabled

Click Apply. You may need to reboot your xbox for changes to take effect.

In order for UPnP to work as intended the client device (the xbox) must be using DHCP to obtain an IP address from the UPnP enabled router. To verify your Xbox is using DHCP, as opposed to assigning itself a static ip - open the dashboard and navigate to:
System -> Network Settings -> Edit Settings ->
Select "IP Settings"
Verify "Automatic"

To see what your Xbox thinks about your NAT try the "Live Connection Test"
System -> Network Settings -> "Test Xbox LIVE Connection"

Wednesday, September 3, 2008

Easy DD-WRT wireless bridge

So this is me connecting to a dd-wrt on the other side of the room - no wires


First you have to be able to connect to both routers on different ip's on the same subnet via wired connection.

primary gateway - 192.168.1.1
remote client bridge - 192.168.1.2

If you're all set up and rocking it with your primary gateway on 192.168.1.1 - but you need to add this new device which defaults to the same ip into the mix....
Just log into your current device and change it's ip to .3 - then plug in the new router, navigate to it on .1 - change it .2 - go back to the original on .3 and put it back on .1

You *may* want to go ahead and disable DHCP on the remote client bridge while your in there, but only if you're not going to immediately configure wireless.

Remote client bridge (192.168.1.2) wireless setup:

Step 1:
Wireless -> Basic Settings

Wireless Mode: Client Bridge
Wireless Network Name (SSID): "SSID of primary gateway / wireless AP"

click Apply

Step 2:
Wireless -> Wireless Security
configure wireless settings to match your primary gateway's wireless config

Apply changes

That's it, unplug your router and test the connection!

I *highly* recommend you START with 64bit/10 digit hex WEP. Go ahead and change your settings on the primary gateway / wireless AP if you have to. Once you have that working by all means upgrade to a higher security state. But, do your self a favor and start simple to make sure you have it working.

DD-WRT applyuser.cgi hangs

What to do if you're running into the issue with the DD-WRT admin page hanging on the applyuser.cgi script when you try to save changes.

SYMPTOM:
when you click 'apply' you get directed to the address -
http://192.168.1.1/applyuser.cgi
Which is followed by a blank white screen. Navigating back just proves your changes were not affected.

SOLUTION:
restart the browser - it's probably just a cookie with a hung up user session or something, but I couldn't find it. Other suggestions would be very welcome...

HOW TO: DD-WRT on Asus WL-500G Premium V2

Our goal is simple:


Put DD-WRT on an Asus WL-500G Premium V2

Our process is straight forward
  1. establish ip connectivity to router
  2. download dd-wrt firmware
  3. download Asus WL-500G Premium V2 utilitypack
  4. reboot router in 'restore' mode
  5. disable windows firewall (really?! Yes, I'm afraid so)
  6. install/run Firmware Restoration utility
  7. browse to new firmware and click upload
  8. wait for router to reboot automatically
  9. re-enable windows firewall
Step 1:
My current router was already running on 192.168.1.1 - so I moved it to 192.168.1.2 left my pc on dhcp. I suppose you could always configure a static ip 192.168.1.??? and a subnet of 255.255.255.0 - The point is you have to be able to ping the asus on 192.168.1.1 !

Step 2:
DD-WRT download section:
http://www.dd-wrt.com/dd-wrtv3/dd-wrt/downloads.html

stable -> dd-wrt.v24 SP1 -> Consumer -> ASUS -> WL500g-Premium ->
dd-wrt.v24_mega_generic.bin

Step 3:
GAWD ASUS SITE SUCKS! I hate javascript sometimes...

Asus download section:
http://support.asus.com/download/download.aspx

Product: Wireless
Series: AP/Router
Model: WL-500gP V2

Direct WL-500gP V2 download section
Direct WL-500GP V2 Utility download

*I also found it on the included CD, just run D:\Utility\setup.exe

Step 4:
  • Unplug the router
  • Press and hold small black 'restore' button on back next to antenna
  • Plug in router and continue to hold 'restore'
  • Wait for the power 'icon' on the front to blink on/off once per second
  • Release 'restore' button - power icon should continue to blink
Success:
You should still be able to ping the router on 192.168.1.1 while it is in this mode.

Step 5:

Disable Windows Firewall

You can skip this step for now, but you're going to have to do it eventually. The ASUS firmware Restoration Utility will run, but won't upload while the windows firewall is active.

Start -> Control Panel -> Windows Firewall -> Off

Step 6:

Extract the UT_WL500gPv2_4008.zip that you downloaded earlier and run the setup.exe to install the Asus WL-500G Premium V2 utilitypack

Run the Firmware Restoration Utility:
Start -> Program Files -> ASUS Utility -> WL-500gP V2 Wireless Router -> Firmware Restoration

Step 7:

Click Browse and navigate out to:
dd-wrt.v24_mega_generic.bin

Click Upload...

It kind of bugs me that it didn't ASK what ip I wanted to upload this firmware to, but I guess I think it 'knows'...

While the progress bar is pushing around you may see some blinking on the router at first, but after awhile it just sits there:

Should take about a minute for the progress bar to quit, and then you can click close.

Step 8:

Really, just sit there... for like 45-60 seconds. I know, seems like forever. Eventually the modem will reboot, and you'll get the 'AIR' light lit up and I noticed I could ping it again. While you waiting don't forget Step 9!

Step 9:

Don't forget to turn back on windows firewall!!!

DONE. Navigate back to http://192.168.1.1/ and setup the user:


You haven't really LIVED until you've ssh'd into your router:

login as: root
DD-WRT v24 mega (c) 2008 NewMedia-NET GmbH
Release: 07/27/08 (SVN revision: 10012:10013)
root@192.168.1.1's password:
==========================================================

____ ___ __ ______ _____ ____ _ _
| _ \| _ \ \ \ / / _ \_ _| __ _|___ \| || |
|| | || ||____\ \ /\ / /| |_) || | \ \ / / __) | || |_
||_| ||_||_____\ V V / | _ < | | \ V / / __/|__ _|
|___/|___/ \_/\_/ |_| \_\|_| \_/ |_____| |_|

DD-WRT v24
http://www.dd-wrt.com

==========================================================


BusyBox v1.11.1 (2008-07-27 19:56:11 CEST) built-in shell (ash)
Enter 'help' for a list of built-in commands.

root@DD-WRT:~# cat /proc/cpuinfo
system type : Broadcom BCM5354 chip rev 2
processor : 0
cpu model : BCM3302 V2.9
BogoMIPS : 239.20
wait instruction : no
microsecond timers : yes
tlb_entries : 32
extra interrupt vector : no
hardware watchpoint : no
VCED exceptions : not available
VCEI exceptions : not available
root@DD-WRT:~#

Note the superuser username. Instead of the username you created in the DD-WRT initial configuration page, you have to use 'root' as the login username - but still the same password.

ASUS WL-500g Premium V2 and DD-WRT

So I picked the ASUS WL-500g Premium because...
  1. I knew it was supported by DD-WRT
  2. Lots of memory (32 MB)
I think I read somewhere that it was actually a pretty good piece of hardware for this kind of thing... but it doesn't matter - it looks cool:


Not going to be needing this:


ASUS WL-500g Premium V2 default IP:
192.168.1.1

ASUS WL-500g Premium V2 default Login:
Username: admin
Password: admin

So this is what we're trying to get rid of:

OK, so now how to get DD-WRT onto this thing...

HOW TO: DD-WRT wireless bridge

Got my package from newegg today:

Two ASUS WL-500g wireless routers. I plan to load them with DD-WRT and build a stable wireless bridge.

So I'd like to create a complete guide here, as I work - more updates to follow!

Update:
HOW TO: DD-WRT on Asus WL-500G Premium V2
Easy DD-WRT wireless bridge